
Knowing how to Read a hiking map is like having a conversation with the landscape itself. It’s a skill that opens up new worlds, allowing you to navigate through unfamiliar terrain, avoid potential dangers, and truly immerse yourself in the great outdoors.
Imagine setting out to bake a complex dessert without a recipe, or trying to assemble a piece of furniture without instructions. It’s possible, but it’s going to be a whole lot harder, and there’s a good chance you’ll end up lost and frustrated.
That’s what it’s like to head out on a hiking trail without knowing how to read a map. It’s not just about knowing your north from your south – it’s about understanding the language of the land and being able to interpret the symbols, scales, and topographic details that can guide you safely on your journey.
And just like any language, it can seem a little intimidating at first. But don’t worry – this guide is here to help you decode the symbols, scales, and contours that will turn you into a seasoned map reader in no time.
Let’s get started!
In This Article
Understanding the Basics of a Hiking Map
What is a Hiking Map?
A hiking map is a specialized type of map designed to represent specific outdoor areas that are popular for hiking. Unlike regular maps, hiking maps include detailed information about hiking trails, terrain types, distances, and notable features in the landscape such as rivers, peaks, and forests. They also include important safety information such as the location of emergency shelters or potentially dangerous areas.
Importance of Map Reading in Hiking
Map reading is a fundamental skill for any hiker. With a good understanding of how to read a hiking map, you can plan routes more effectively, navigate the terrain safely, and fully appreciate the landscape you are exploring. It allows you to identify landmarks, find the best routes to your destination, and know where you are at all times. It’s also a vital skill for safety, as it can help you avoid dangerous areas, find your way back if you get lost, and provide crucial information to rescue teams in case of an emergency.
Types of Hiking Maps
There are several types of hiking maps, each with its own advantages and uses:
- Topographic Maps: These are the most detailed type of hiking map. They use contour lines to represent the three-dimensional shape of the terrain on a two-dimensional surface. They also include information about trails, distances, and natural and man-made features.
- Trail Maps: These maps focus on specific hiking trails. They usually provide information about the trail’s length, difficulty level, landmarks, and facilities.
- Digital Maps: With the advent of GPS and smartphone apps, digital maps have become increasingly popular for hiking. They can be downloaded and used offline, provide real-time location tracking, and often include additional features such as route planning and terrain visualization.
Remember, the type of map you choose will depend on your needs, the nature of your hike, and your personal preferences.
Decoding the Symbols on a Hiking Map
Common Symbols on a Hiking Map
Hiking maps are filled with a variety of symbols representing different features of the landscape. These can include trails, bodies of water, camping areas, points of interest, and more.
For example, dotted lines often represent trails, while blue lines indicate rivers or streams. Solid black lines usually signify boundaries, such as those of a park or a forest. Triangles or small tent symbols often represent camping areas.
It’s important to familiarize yourself with these symbols before setting out on your hike. Most maps will include a key or legend to help you interpret these symbols.
Here’s a good overview of reading a hiking map from REI
Understanding Topographic Symbols
Topographic maps use contour lines to represent the shape and elevation of the terrain. These lines connect points of equal elevation, meaning if you were to walk along a contour line, you would stay at the same elevation the entire time. The closer these lines are together, the steeper the terrain.
In addition to contour lines, topographic maps use a range of symbols to represent different types of terrain and features. For example, woodland areas are often represented by clusters of small tree symbols, while marshy areas might be shown with wavy blue lines. Again, a key or legend is usually provided to help you understand these symbols.
Understanding these symbols and how to interpret contour lines is crucial for navigating challenging terrain and planning safe and efficient hiking routes.
Learning About Map Scales
What is a Map Scale?
The scale of a map is a ratio that represents the relationship between a certain distance on the map and the actual distance on the ground. For example, a common scale for a hiking map might be 1:24,000. This means that one inch (or any other unit) on the map corresponds to 24,000 of the same units in the real world. So, one inch on the map would represent 24,000 inches (or 2000 feet) on the ground.
How to Interpret Map Scales
Understanding the scale of a map is crucial for estimating distances and planning your hike. For example, if you’re looking at a trail that’s one inch long on a 1:24,000 scale map, you know that trail is 2000 feet long in reality.
To interpret the scale, you’ll need to do a bit of mental math or use a ruler or a map scale tool. If your map uses an inch as the unit, and you want to know the distance in miles, remember that there are 63,360 inches in a mile. So, on a 1:24,000 scale map, an inch would represent approximately 0.38 miles (24,000 divided by 63,360).
Understanding map scales will help you estimate hiking times, choose appropriate routes, and ensure you’re prepared for the distance you’ll be covering.
How to Use a Compass with a Map
Using a compass alongside a map can greatly aid in navigation, especially in areas where trails or landmarks are not clearly visible. Here’s a basic step-by-step guide:
- Align the compass with the map: Lay your map flat and place your compass on top of it. Align the edge of the compass with the map’s grid lines that point towards true north.
- Rotate the compass dial: Turn the compass housing (the part that rotates) so that North on the dial aligns with North on the map.
- Take a bearing: Identify your current position and your desired destination on the map. Draw a straight line between these two points. Then, align the edge of your compass with this line, making sure the direction of travel arrow points towards your destination.
- Adjust for declination: Declination is the difference between magnetic north (where the compass needle points) and true north (the top of the map). The amount of declination varies depending on where you are in the world. If necessary, adjust your compass to account for this.
- Follow the compass: Hold the compass flat in your hand and turn your body until the compass needle aligns with the orienting arrow. The direction of travel arrow on your compass now points to your destination in the real world.
Remember, practice makes perfect. It’s a good idea to practice using a compass in a familiar area before relying on it for navigation during a hike.
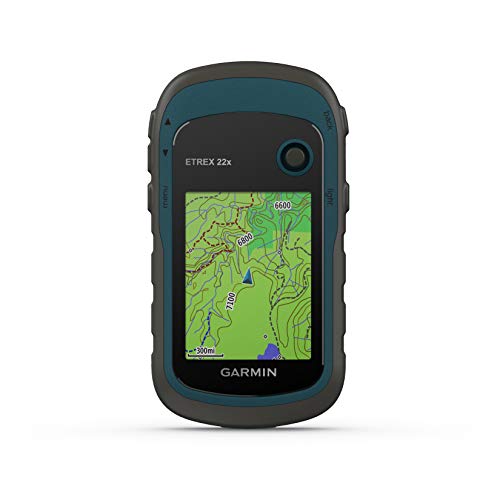
- Explore confidently with the reliable handheld GPS
- 2.2″ sunlight-readable color display with 240 x 320 display pixels for improved readability

- Large 3 inch Sunlight-readable color display for easy viewing
- Trigger an interactive SOS to the geos 24/7 search and rescue monitoring center, two-way messaging via the 100% Global Iridium satellite network (satellite subscription required)

- Rugged handheld navigator with preloaded worldwide basemap and 2.2 inch monochrome display
- WAAS enabled GPS receiver with HotFix and GLONASS support for fast positioning and a reliable signal

- Don’t have cell coverage or battery dies on your smartphone when you are out hiking, backpacking, or hunting? The Bushnell BackTrack Mini GPS will help you get back to your basecamp or trailhead.
- The Bushnell Backtrack Mini uses GPS technology to capture your trip or waypoint so you can guide back to your starting position. Battery lasts up to 35 hours. Rugged and waterproof to handle anything you put the Bushnell BackTrack Mini GPS through
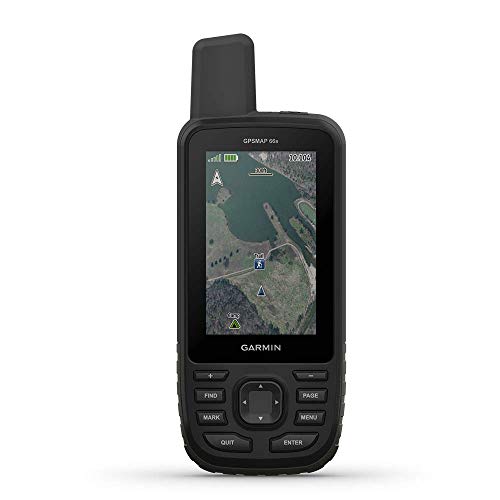
- Premium GPS handheld with BirdsEye Satellite Imagery subscription
- Large, 3” sunlight-readable color display for easy viewing
Using GPS and Technology for Hiking
How to Use GPS for Hiking
GPS, or Global Positioning System, is a satellite-based navigation system that can provide accurate location and time information anywhere on or near the Earth’s surface. Here’s how you can use it for hiking:
- Choose a GPS device or app: There are many handheld GPS devices and smartphone apps designed specifically for outdoor activities like hiking. Choose one that suits your needs and budget. Some popular GPS apps for hiking include AllTrails, Gaia GPS, and ViewRanger.
- Download maps before your hike: Most GPS apps allow you to download maps for offline use. This is crucial as you might not have a reliable internet connection in remote hiking areas.
- Mark waypoints: Waypoints are specific geographical locations, defined by longitude and latitude, that you can mark on your GPS. These could be the start and end points of your hike, any landmarks you want to visit, or potentially hazardous areas to avoid.
- Follow your route: During your hike, you can use your GPS to track your progress along your planned route, check your current location, and navigate to your marked waypoints.
Apps and Tools for Hiking Navigation
In addition to GPS apps, there are several other tools and apps that can assist with hiking navigation:
- Compass Apps: These can turn your smartphone into a compass. However, they should be used as a backup rather than a primary navigation tool, as they can be less accurate than a traditional compass.
- Topographic Map Apps: These apps provide detailed topographic maps and often include features like route planning and tracking.
- Hiking Trail Apps: These apps provide information about specific hiking trails, including maps, difficulty levels, reviews from other hikers, and more.
Remember, while technology can be a great aid for hiking navigation, it should not replace traditional map reading skills. Always carry a physical map and compass as a backup.
Final Thoughts
Mastering the art of map reading and navigation is more than just a valuable hiking skill – it’s a ticket to greater freedom and confidence in the great outdoors. With these skills in your toolkit, you can safely explore new trails, venture off the beaten path, and fully immerse yourself in the natural world.
So why wait? Grab a map, a compass, and maybe a GPS, and start practicing today. The mountains are calling, and with your new skills, you’ll be ready to answer
- Amazon Kindle Edition
- Knight, Jason (Author)

- MacWelch, Tim (Author)
- English (Publication Language)
We are participants in the Amazon Services LLC Associates Program, an affiliate advertising program designed to provide a means for sites to earn advertising fees by advertising and linking to Amazon.com